Storefront Setup
The Virtual Try-On app integrates directly with your Shopify store using Online Store 2.0 App Blocks. This ensures it works seamlessly with your theme and doesn't require editing theme code.
Adding the Try-On Button
Follow these steps to add the "Virtual Try-On" button to your product pages:
- From your Shopify Admin, go to Online Store > Themes.
- Find your current theme and click Customize.
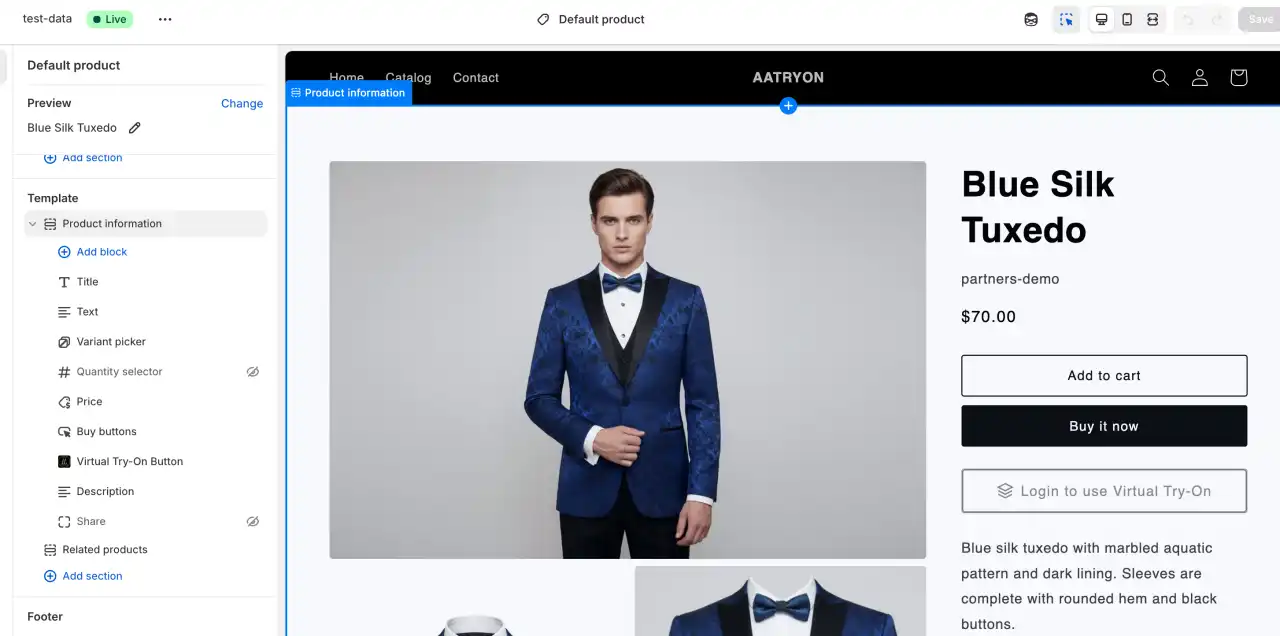
- In the dropdown menu at the top, select Products, then select Default product (or the specific template you want to edit).
- In the sidebar on the left, locate the Product Information section.
- Click + Add block within that section.
- Scroll down to the Apps category and select Virtual Try-On Button.
- The button block will appear in the list. You can drag and drop it to move it up or down (e.g., place it below the "Buy Now" button).
- Click Save in the top right corner.
Tip: You can preview the changes on your live site immediately after saving.
Customer Experience
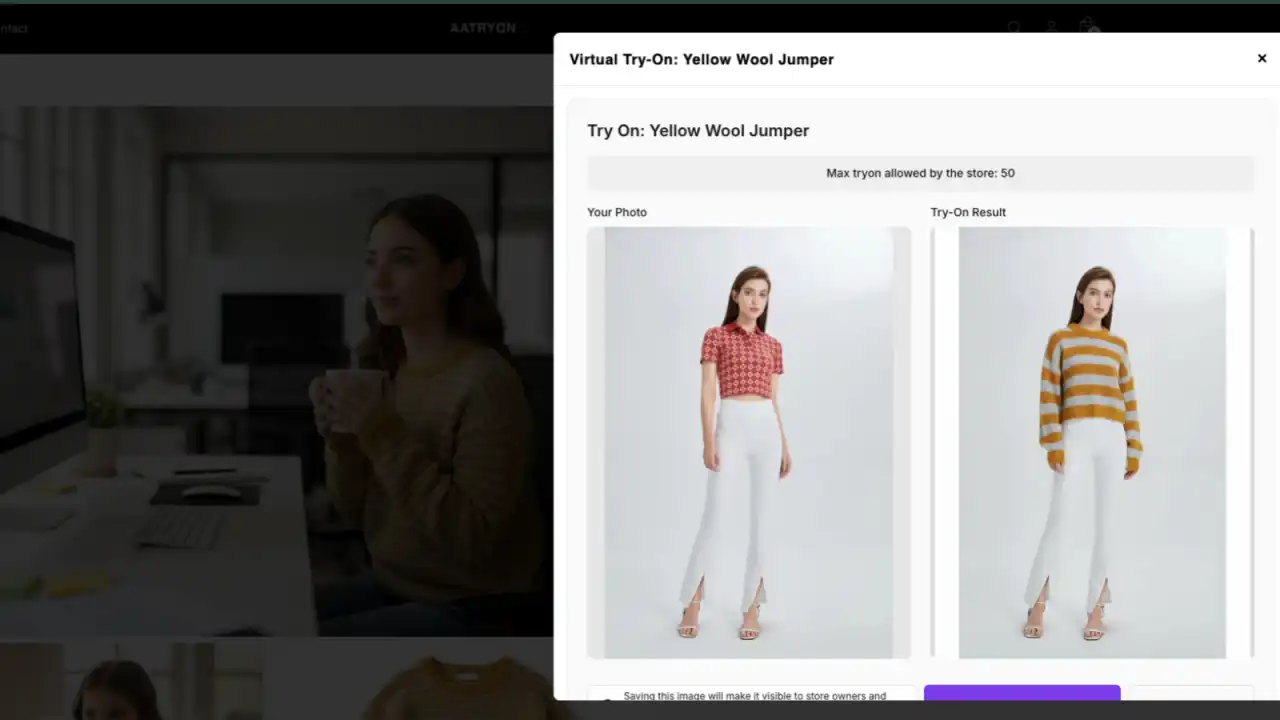
Once installed, customers will see a "Try On" button on enabled products.
- Step 1: The customer clicks the "Try On" button.
- Step 2: A modal window opens where they can upload their own photo or choose a model.
- Step 3: The AI generates the try-on image in seconds.
- Step 4: The customer can view the result, download it, or save it to their history (if configured).

Troubleshooting
If the button is not appearing:
- Check the Admin Panel > Catalog to ensure the product has "Try-On" enabled.
- Verify that you have saved your changes in the Theme Editor.
- Ensure the App Block is placed inside the Product Information section.