Templates Management
The Templates section lets you control what design options are shown to your customers and what prices you charge for premium options. Changes apply immediately to new customer sessions.
Available Templates
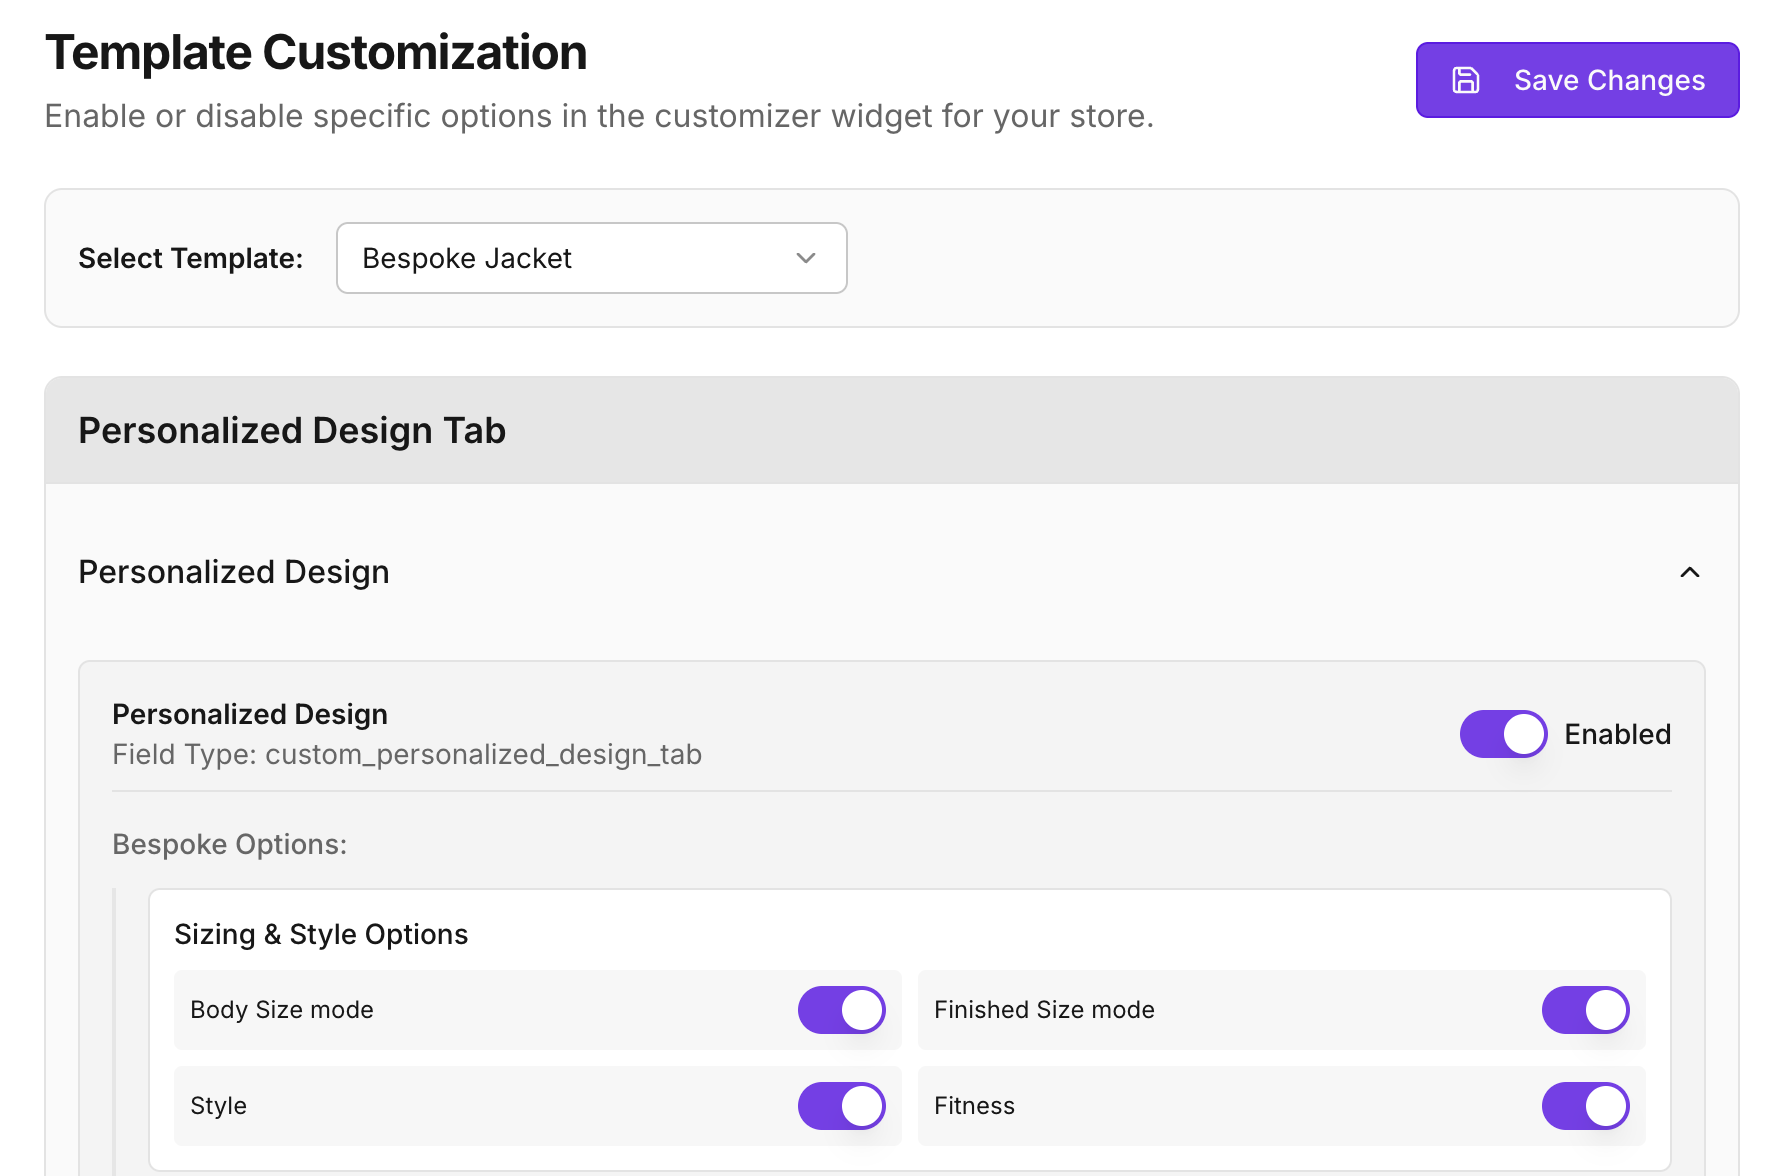
Select the template you want to configure from the Select Template dropdown. The following templates are available:
Men's Templates
| Template | Product Tag (Auto-Detect) |
|---|---|
| Jacket | AA-CustomSuit-Jacket |
| Pant | AA-CustomSuit-Pant |
| Vest | AA-CustomSuit-Vest |
| Bespoke Jacket | AA-CustomSuit-Bespoke-Jacket |
| Bespoke Pant | AA-CustomSuit-Bespoke-Pant |
| Bespoke Vest | AA-CustomSuit-Bespoke-Vest |
| Bespoke 2PC Suit | AA-CustomSuit-Bespoke-2PC |
| Bespoke 3PC Suit | AA-CustomSuit-Bespoke-3PC |
| MTM 2PC Suit | AA-CustomSuit-MTM-2PC |
| MTM 3PC Suit | AA-CustomSuit-MTM-3PC |
Women's Templates
Women's templates support two detection methods — use whichever suits your product setup:
| Template | Product Tag | Auto-Detected From Variant Title |
|---|---|---|
| Bespoke Women Jacket | AA-Womens-Bespoke-Jacket | Contains "women/woman/ladies" + "jacket" |
| Bespoke Women Pant | AA-Womens-Bespoke-Pant | Contains "women/woman/ladies" + "pant" or "trouser" |
| Bespoke Women Vest | AA-Womens-Bespoke-Vest | Contains "women/woman/ladies" + "vest" |
| Bespoke Women Overcoat | AA-Womens-Bespoke-Overcoat | Contains "overcoat" |
| Bespoke Women Skirt | AA-Womens-Bespoke-Skirt | Contains "skirt" |
| Bespoke Women Channel Style | AA-Womens-Bespoke-Channel | Contains "channel" |
| Bespoke Women 2PC Suit (With Pant) | AA-Womens-Bespoke-2PC-Suit-WithPant | Contains "women/woman/ladies" + "2PC"/"suit" + "pant"/"trouser" |
| Bespoke Women 2PC Suit (With Skirt) | AA-Womens-Bespoke-2PC-Suit-WithSkirt | Contains "women/woman/ladies" + "2PC"/"suit" + "skirt" |
Multiple Templates per Product (Variant-Based Loading)
A single Shopify product can offer multiple garment types as variants (e.g. Jacket, Pant, 2PC Suit on one product page). The customization panel automatically loads the correct template based on the variant the customer has selected — no manual template switching needed.
How It Works
- Create a Shopify product with multiple garment-type variants. Name each variant clearly, e.g. "Men's Jacket", "Men's Pant", "Men's 2PC Suit".
- The app detects the selected variant title and maps it to the appropriate template automatically.
- When the customer switches variants on the product page, the customization panel refreshes to show the design options for that garment type.
Variant Title Matching Rules
The template is selected based on keywords in the variant title (case-insensitive):
| Variant Title Contains | Template Loaded |
|---|---|
| "jacket" (men's) | Jacket |
| "pant" or "trouser" (men's) | Pant |
| "vest" (men's) | Vest |
| "2pc" or "2-piece" + "suit" | 2PC Suit (Jacket + Pant) |
| "3pc" or "3-piece" + "suit" | 3PC Suit (Jacket + Pant + Vest) |
| "women/woman/ladies" + "jacket" | Bespoke Women Jacket |
| "women/woman/ladies" + "pant/trouser" | Bespoke Women Pant |
| "skirt" | Bespoke Women Skirt |
| "overcoat" | Bespoke Women Overcoat |
Predefined Styles
Templates include a curated library of predefined styles — combinations of fabric, lining, and design options pre-selected to give customers a starting point. Customers can select a style and then further customise individual options.
Men's Predefined Styles
- Designed Jacket Styles: Ready-made jacket combinations with pre-selected fabric and design option sets. These cover popular classic and contemporary jacket styles, each with a model image showing the finished look.
- Designer Jacket Styles: A curated selection of designer-inspired jacket styles with distinctive styling (lapel, buttons, pocket configurations) and recommended fabric pairings.
Women's Predefined Styles
- Bespoke Women's Styles: A curated collection of women's bespoke styles with model imagery, covering jackets, suits, and occasion wear. Each style pre-selects a fabric and the key design options for that look, allowing customers to personalise from there.
Hiding / Showing Design Options
Each template comes with a full set of design options. If you don't want to offer certain options in your store, you can hide them individually or hide an entire section at once.
- Select the template from the Select Template dropdown.
- Browse the design option sections (e.g. Front Button, Lapel Style, Pocket Style).
- To hide an entire section, flip the section-level toggle to Off.
- To hide an individual option within a section, flip that option's toggle to Off.
- Click Save. Changes take effect immediately for new customer sessions — no theme changes needed.
Setting Custom Option Prices
By default, each design option carries its built-in price (shown as the Default price). You can override any option's price to charge your customers more or less than the default — or make a paid option free.
How to set a custom price
- Select the template from the Select Template dropdown.
- Click the Option Pricing tab (shown alongside the design options list).
- The list shows every priceable design option across all categories, grouped by section. Each row shows:
- Option name — the label shown to customers.
- Default price — the built-in price from the template (e.g. $20).
- Your price — the price you want to charge customers. Leave blank to use the default.
- Enter your custom price in the Your price field for any option you want to override. Set to
0to make a paid option free. - Click Save.
Importing Drop Ship Variants
When importing a drop ship product, you choose which garment type variants to add to your store and set a retail price for each. The import screen shows:
- Garment Type — e.g. Jacket, Pant, Vest, 2PC Suit, 3PC Suit, Overcoat.
- Supplier Cost — calculated per garment type from the fabric book and pricing set by the OTS Admin. This is your cost, not the customer price.
- Retail Price — your selling price, editable per variant.
- Profit — the difference between your retail price and supplier cost, shown in green (positive) or red (negative) so you can spot underpriced variants instantly.
Setting Profit Margins
Use the Profit Setting controls at the top of the import screen to apply a margin to all selected variants at once:
- % Margin — calculates retail as:
CEIL(supplier cost × (1 + margin% ÷ 100)). For example, a 30% margin on a $269 jacket gives a retail price of $350. - Fixed $ — calculates retail as:
CEIL(supplier cost + fixed amount). For example, a $100 fixed markup on a $269 jacket gives $369.
Enter your margin value, then click Select All to apply it to every available variant, or check individual variants to apply it only to selected rows. You can also edit any variant's retail price directly in the price field.