Installation Instructions
Free Trial: Your first month is completely free — no charges until the trial ends. The trial starts on the day of first installation. Switching subscription plans does not reset or extend the trial — you will still receive the full trial period based on the original install date. Please contact our support team if you need any assistance.
Adding the A&A Custom Suit option involves the following steps:
- Step 1: Add the "A&A Custom Suit" button to your theme's Product template (to show where exactly you want the "Customize" button to appear).
- Step 2: Enable the Customize button for your products.
- Step 2a: For your own Store Products.
- Step 2b: For Drop Ship Products from our catalog.
Step 1: Add the App Block
- From your Shopify Admin, go to Online Store > Themes.
- Find your current live theme and click Edit Theme.
- Select your Product template where you want to add the button (e.g., Products > Default product).
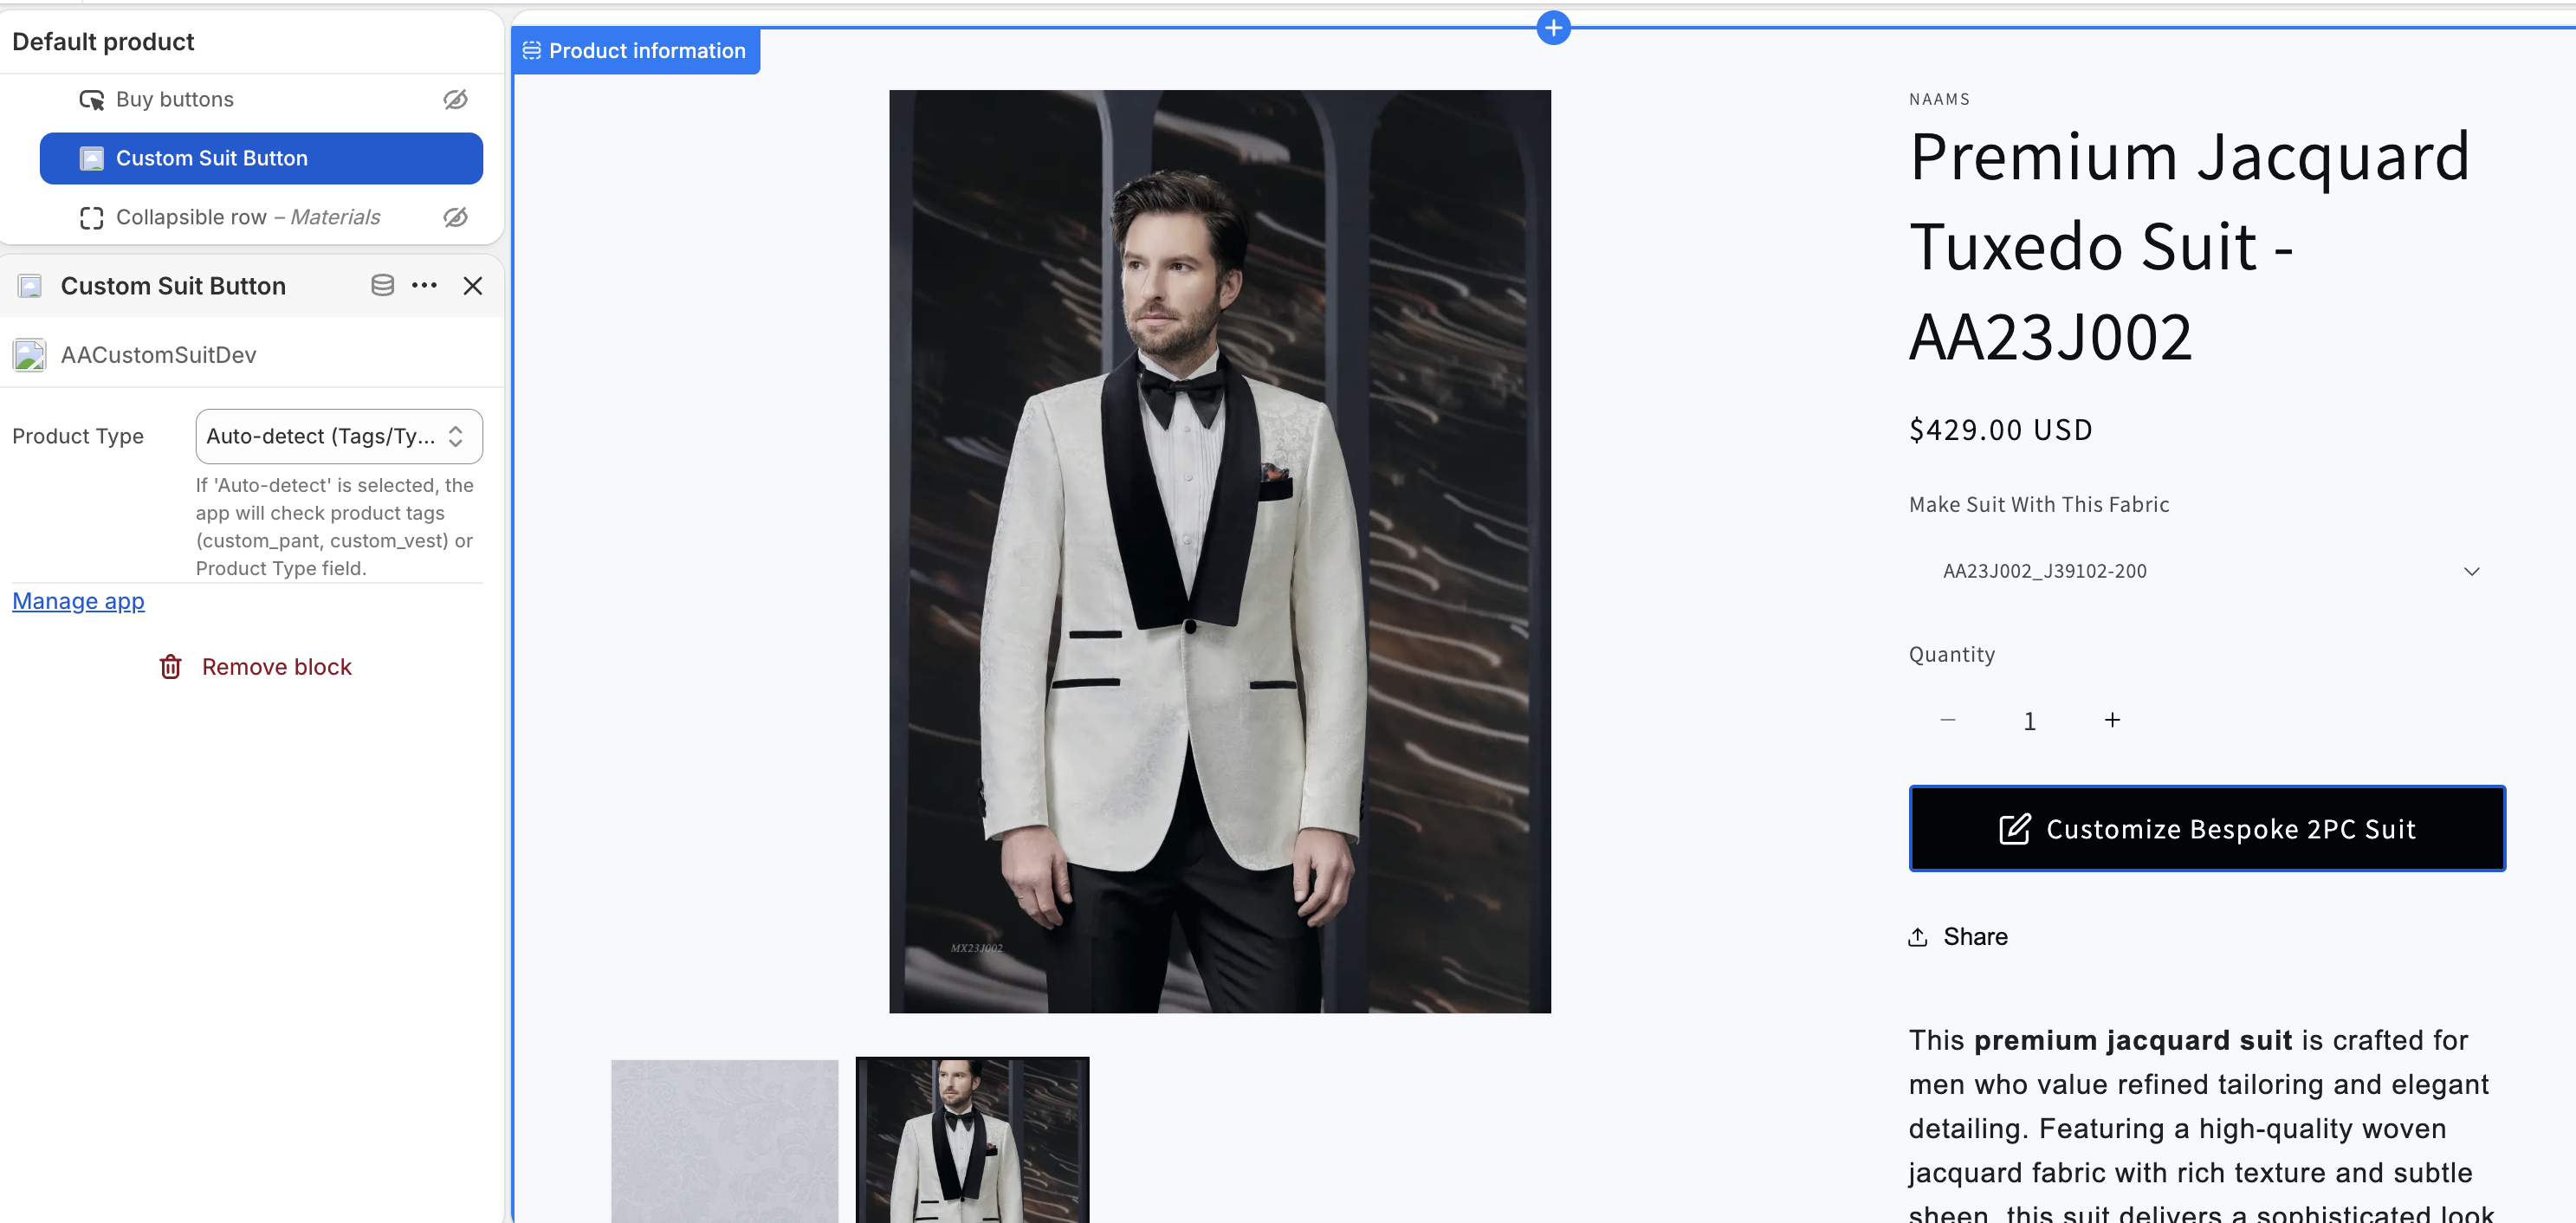
- In the Product Information section, decide where you want the A&A Custom Suit button. Just below the "Buy buttons" is a popular choice.
- Click + Add block.
- Select the Apps tab, then click A&A Custom Suit Button.
- The widget will appear in your preview. Drag it to your desired position.
- Our template adds a buy button automatically. You should remove the default Buy Buttons to avoid duplicates. This step is mandatory.
- Click Save in the top right corner.
Choosing a Template for your Product
A&A Custom Suit includes templates for Men's and Women's garments. You can assign a template in two ways:
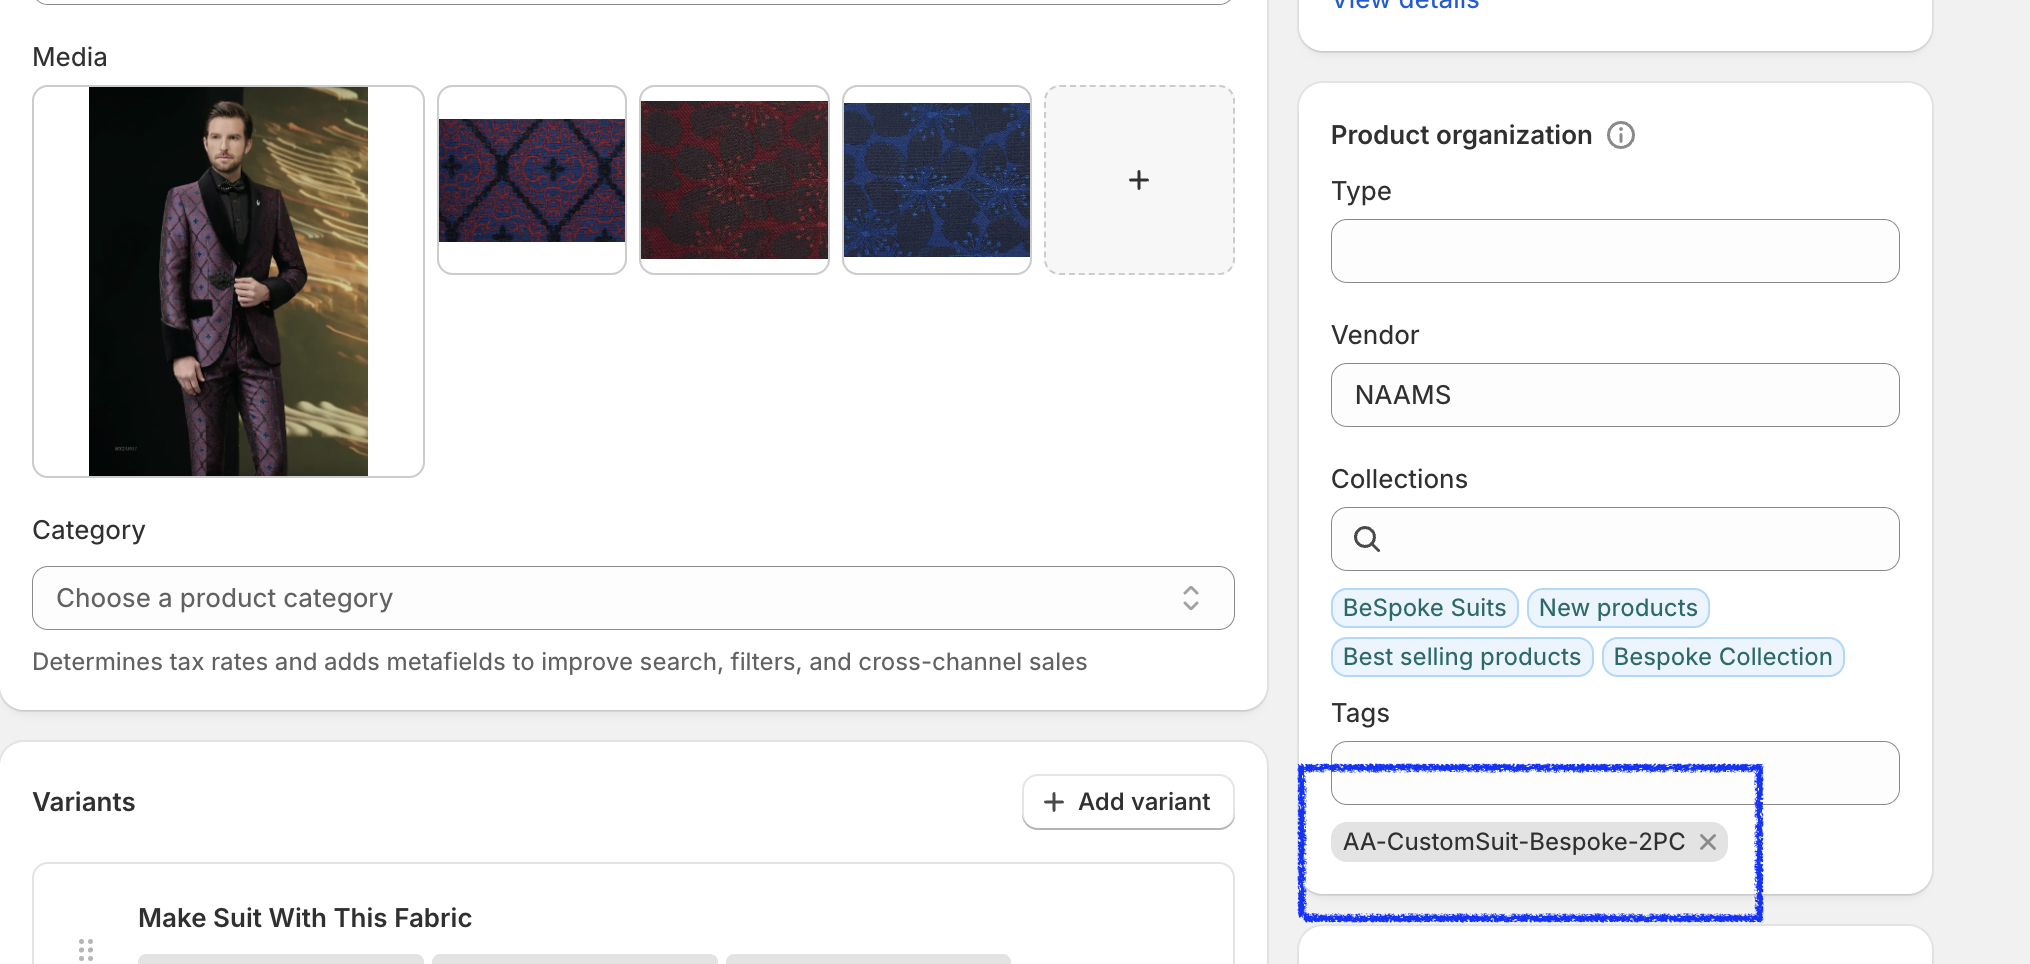
Option 1: Auto Detect (Tag-Based) — Men's Garments
The app automatically detects the correct Men's template based on the product tag. Add exactly one of the following tags to your product:
- Jacket:
AA-CustomSuit-Jacket - Pant:
AA-CustomSuit-Pant - Vest:
AA-CustomSuit-Vest - Bespoke Jacket:
AA-CustomSuit-Bespoke-Jacket - Bespoke Pant:
AA-CustomSuit-Bespoke-Pant - Bespoke Vest:
AA-CustomSuit-Bespoke-Vest - MTM 2PC Suit:
AA-CustomSuit-MTM-2PC - MTM 3PC Suit:
AA-CustomSuit-MTM-3PC - Bespoke 2PC Suit:
AA-CustomSuit-Bespoke-2PC - Bespoke 3PC Suit:
AA-CustomSuit-Bespoke-3PC
Women's Templates — Tag-Based (Single-Variant Products)
For single-variant Women's products, add one of the following tags to detect the correct template — the same way Men's tags work:
- Bespoke Women Jacket:
AA-Womens-Bespoke-Jacket - Bespoke Women Pant:
AA-Womens-Bespoke-Pant - Bespoke Women Vest:
AA-Womens-Bespoke-Vest - Bespoke Women Overcoat:
AA-Womens-Bespoke-Overcoat - Bespoke Women Skirt:
AA-Womens-Bespoke-Skirt - Bespoke Women Channel Style:
AA-Womens-Bespoke-Channel - Bespoke Women 2PC Suit (With Pant):
AA-Womens-Bespoke-2PC-Suit-WithPant - Bespoke Women 2PC Suit (With Skirt):
AA-Womens-Bespoke-2PC-Suit-WithSkirt
Women's Templates — Auto Detect via Variant Title (Multi-Variant Products)
For products with multiple Women's garment variants, the template switches automatically when a customer changes the selected variant — no tag needed. Name your variants clearly:
- Bespoke Women Jacket: Variant title contains "women/woman/ladies" + "jacket"
Example: "Women's Jacket", "Ladies Jacket" - Bespoke Women Pant: Variant title contains "women/woman/ladies" + "pant" or "trouser"
Example: "Women's Pant", "Ladies Trouser" - Bespoke Women Vest: Variant title contains "women/woman/ladies" + "vest"
Example: "Women's Vest" - Bespoke Women Overcoat: Variant title contains "overcoat"
Example: "Women's Overcoat", "Overcoat" - Bespoke Women Skirt: Variant title contains "skirt"
Example: "Women's Skirt", "Pencil Skirt" - Bespoke Women Channel Style: Variant title contains "channel"
Example: "Channel Style Jacket"
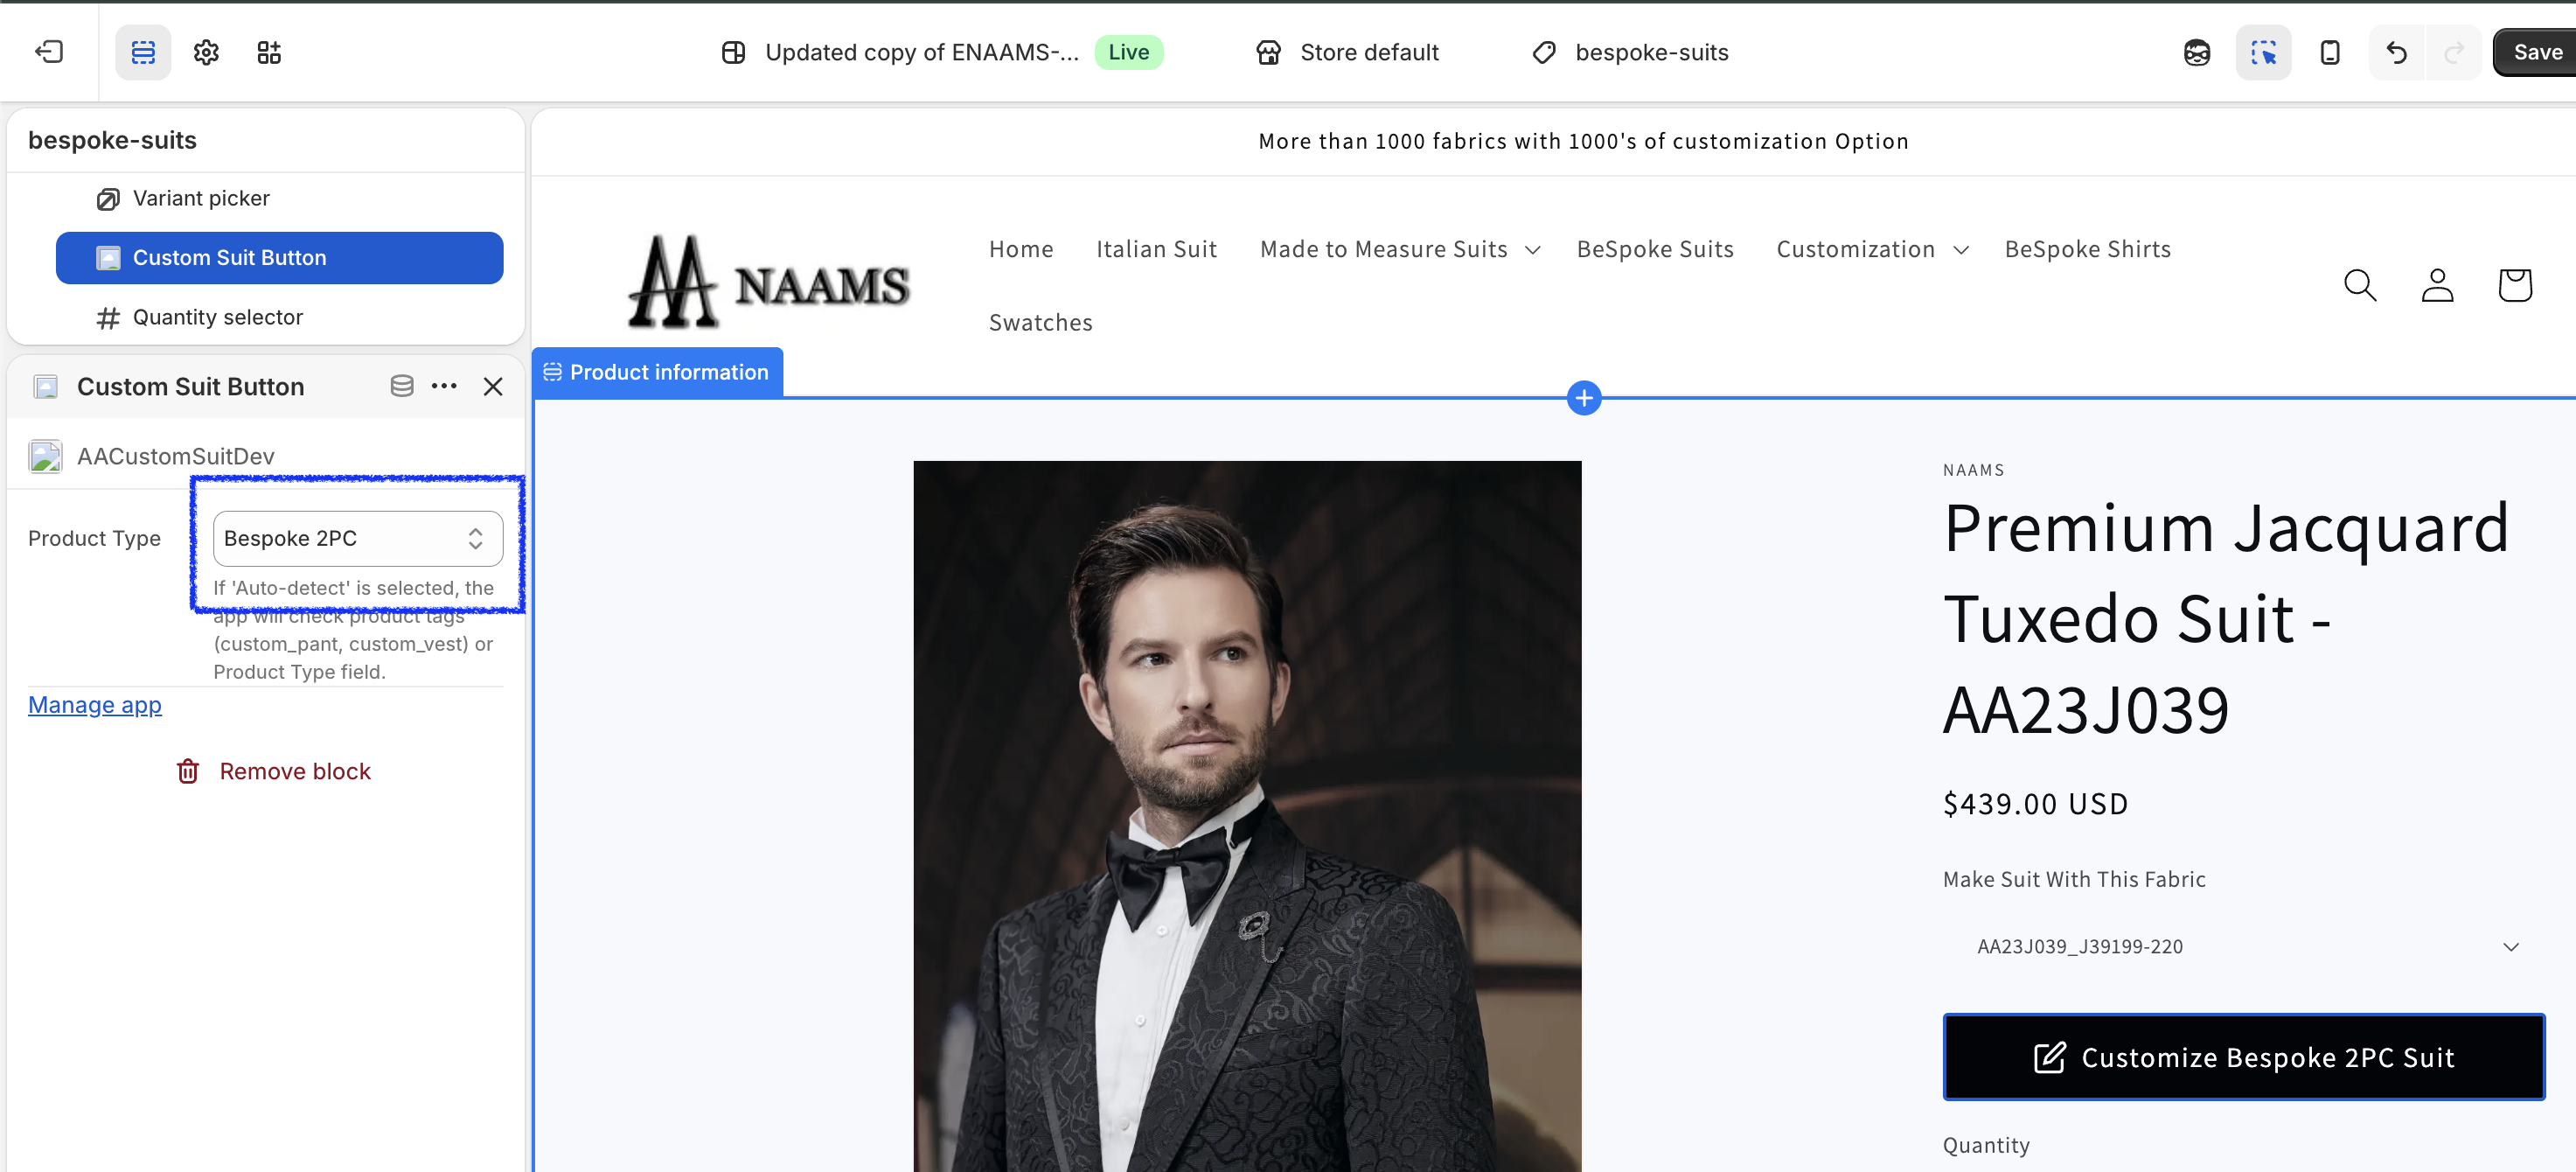
Option 2: Select Specific Template
If you prefer not to use auto-detection, you can assign any template (Men's or Women's) directly to the product from the Admin > Catalog page. This overrides tag and variant-title detection.
This completes Step 1. Return to your Store Admin page for the next step.
Step 2: Enable Products & Configure Options
Now you need to enable the custom suit builder for your products.
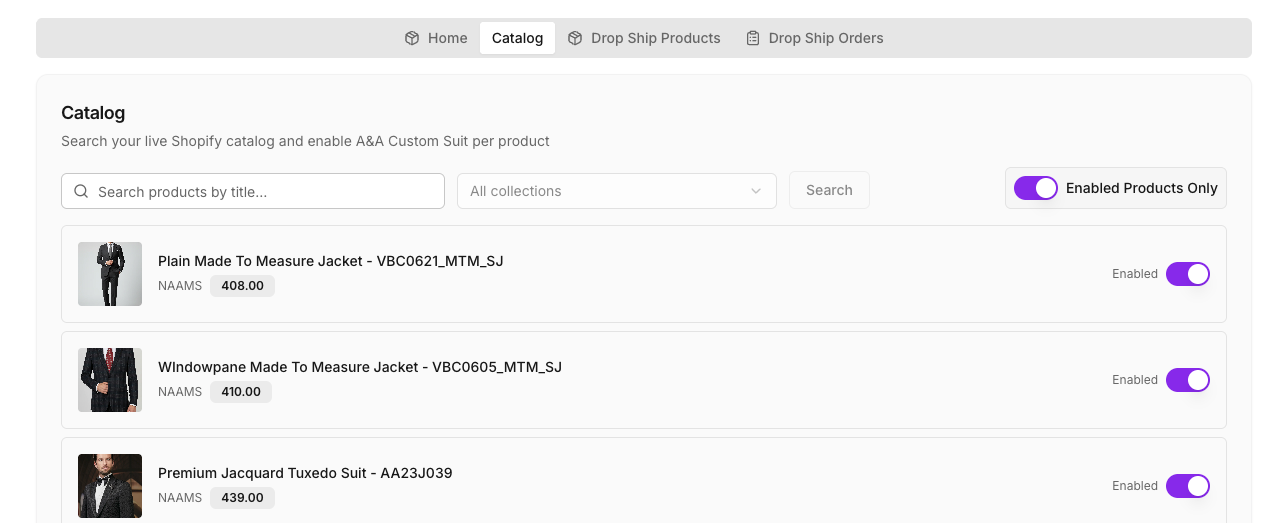
Step 2a: Enable Custom Suit for Store Products
- Go to Apps in your Shopify Admin and open A&A Custom Suit.
- Click on the Catalog tab.
- Find your store product and toggle the switch to On.
- Ensure the product uses the correct Product template from Step 1 and/or the correct Product Tag.
- If you selected "Auto Detect" in Step 1, a Product Tag is mandatory for the correct template to display.
Step 2b: Enable Custom Suit for Drop Ship Products
To display our products in your store and have us dropship them, follow these steps:
- Go to Apps in your Shopify Admin and open A&A Custom Suit.
- Click on the Drop Ship Products tab.
- Browse the Master Catalog to view available drop ship products.
- Select the garment variants you want to sell (Jacket, Pant, Vest, 2PC Suit, 3PC Suit, Overcoat) and set your retail price for each. The supplier cost is automatically calculated per garment type.
- Click Import to Store. The product and its variants will be created in your Shopify store. Our products come with the default tag required for that garment type. Do not remove or change this tag.
- To add or update variants later, use the Manage Variants button on the Imported tab. You can set profit margins (by percentage or fixed dollar amount), select individual variants, or use Select All to update in bulk.
- Once imported, go to the Catalog tab and ensure the newly added drop ship product is toggled to On.

Troubleshooting
"I added the block but I still don't see the button!"
- Did you Enable the product in the App Catalog tab? (Step 2)
- Did you Save your theme changes?
- Are you viewing the correct product page?
- Does the product have the correct tag or template assigned?